Thursday, April 29, 2021

New Zoom Feature: Immersive View


With the most recent update to Zoom, you are able to enable Immersive View. Though new to Zoom, this feature has been widely used by Microsoft Teams users. If you've watched the NBA or WWE during the pandemic, you have seen virtual crowds. Immersive View provides a similar experience. What it does is allow you to see your meeting attendees in scenes such as an auditorium or as pictures in an art gallery, just to name a few. Take a look at the gif below to see what it can look like in Zoom. 


Get started by opening your Zoom Desktop Client (Mac or PC). Click your profile picture in the top right corner. In the dropdown menu that appears, click Check for Updates. Follow the steps and update the Client to the most recent version.


Once updated, login to your Zoom account on the web. Go to your Settings and navigate over to the In Meeting (Advanced) section.


Scroll down to the section titled Immersive View. Click the toggle to turn on this feature.


The next time you start a meeting, click View in the top right corner. In the dropdown menu that appears, you will now see an option for Immersive. 


In the pop up window that appears, you will see different options for the Immersive View layout. You can arrange your meeting attendees like portraits on a wall (as seen below), in an auditorium, a classroom and more. Each layout has a number that denotes how many can be seen at once.


Below is a sample of what the auditorium layout looks like. 

If you're anything like me, you will be excited to try this new feature. Which layouts will you use? If you have any questions and would like a follow up, contact me via Gmail or Chat at ajuarez@techcoachjuarez.com. My book, The Complete EdTech Coach: An Organic Approach to Digital Learning, co-authored with my wife Katherine Goyette is now available on Amazon. Click here to purchase. It is published by Dave Burgess Publishing. Be sure to follow the hashtag #OrganicEdTech and #CVTechTalk for updates.

Monday, April 26, 2021

Jumping on the EDU TikTok Bandwagon


With kids these days, TikTok is all the rage. What many of us don't know is that "EDU TikTok" is growing rapidly. Teachers are producing TikTok videos as announcements for class, lesson intros and much, much more. Many of my friends in the edtech world are creating quick, edtech tips on TikTok as well. 

I wasn't keen on TikTok, but after showing my first class announcement and lesson intro via TikTok to students, I could see a difference in their interest and engagement. On the edtech side of things, I have gotten nothing but positive responses, so far, on the edtech tips I have been sharing via TikTok. There is something magical that happens when you add some fun music to the message you're trying to convey.

Take a look below at one of my first #EDUTikTok posts. You can find this and more on my new "Quick Tips on TikTok" page on my website.


Get started by recording your source video using your cellphone. I point my phone's camera at the screen and show an intro to a lesson or a brief edtech tip. If I need to manipulate the screen, I hold my phone with my left hand and type/move mouse with my right. If you have any ideas for doing this easier, I am open to suggestions. 

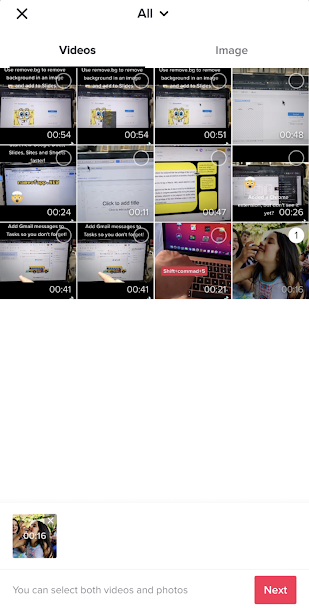
Once you have your source video recorded, open the TikTok app on your phone and start a new post. As seen below, when you start a new post, at the bottom right, you'll see an option to upload a file from your phone. Tap it to access the source video.


Choose the video or image and tap next.


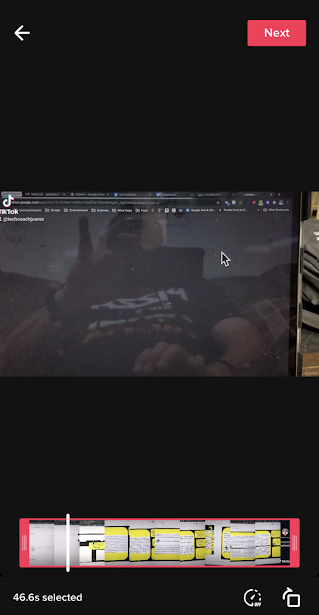
Once you've selected the video, as seen below, you have the option to trim it as you see fit. When you're ready, tap next.


At this point, you have the options to customize your video with sound, filters, voiceover, captions, text and more. If you are just getting started, I recommend sticking with the text and sound until you get comfortable with the other options. 


To add sound or music, tap sounds and then the More button search for music.


Adding music to your TikTok video is a great way to have some fun and personalize your message. I like to choose songs that relate somehow to the video I am sharing. It adds a nice touch. In the example shared at the top of this blog post, I used a song called "Zoom Zoom Zoom" to highlight how the tip I demonstrated can help you work faster. When choosing a song, be sure to find one that is at least as long as the video clip you are sharing. If not, there will be silence at the end.


After adding music and text to your video, the next step is to post it. The interface and format are similar to that of Instagram. You are allowed 150 characters in your post.


Friday, April 9, 2021

Get Kids Screencasting with Screencastify Submit for Free


Screencasting is such a great way to get students to demonstrate learning. It gives students the opportunity to insert their voice into and take ownership of their learning. Managing student video recordings, though, can be a hassle. Not too long ago, Screencastify added a feature called Submit. What this does is coordinate with Google Classroom and allows you to create assignments where students will turn in a screencast right from Screencastify.

If you're a current Screencastify user, free or premium, go to your Screencastify account and click My Account.


After clicking My Account, select Integrations and toggle Google Classroom to the On position. You'll be prompted to give Screencastify permission to access your Google Classroom. 


After going through that process, when you click the Screencastify Chrome Extension, select Submit in the dropdown menu. Once you've arrived on the Submit page, get started by clicking New assignment. In the pop up that appears, select Google Classroom.


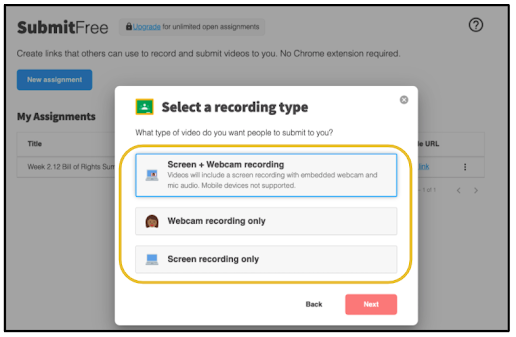
You will be prompted to Select a recording type. Choose Screen + Webcam recording if you want to see students' faces along with their screen. Webcam recording only means you will only see the student and not the screen. Screen recording only will allow students to show their screen, but not their faces. Click Next after making your selection.


The next step is to name your assignment. What you put in here is what will show in Google Classroom. Be sure to leave detailed instructions. If you have English learners, use Google Translate to put instructions in other languages. 


The setup continues as you will choose which classes to assign this screencasting assignment, points, due date and topic.


Below is what it looks like on the student end in Google Classroom. Students will simply click the link to get started.


When students click the link, they will be taken to a new tab in Chrome. They will be prompted to turn on their microphones and cameras and allow permission.


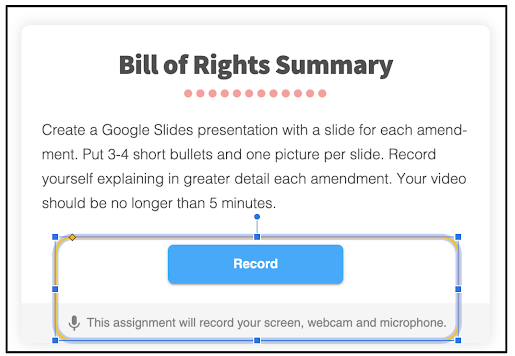
Once the microphone and cameras are on and permission is given, the Record button will turn blue and they will be ready to record. 


Before recording begins, students will be prompted to share their screens. In the pop up that appears, they will need to click the image of their screen and click Share to begin the recording.


There will be a countdown before recording begins.


When the recording begins, a small banner, as seen below, will appear on the bottom of the screen. This lets the student know that their screen is being recorded. There is a pause button on the left side of the banner and a Stop sharing button on the right to stop the recording.


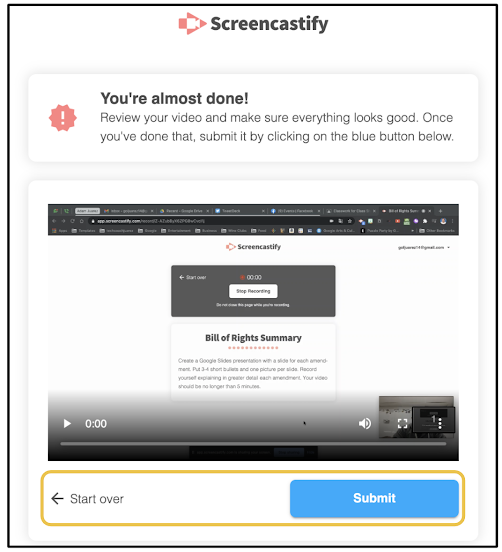
When students are finished recording, they will be taken to a page where they can review their video before turning in. If they are not satisfied with the video, they can click Start over. If satisfied, they will click Submit.


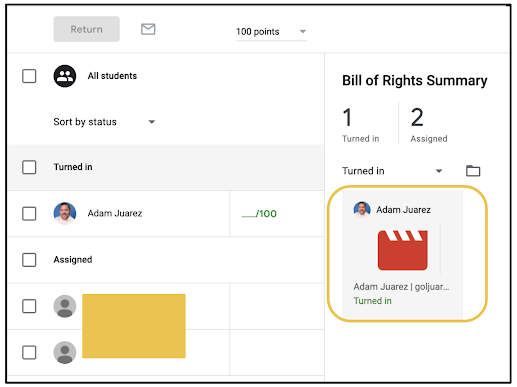
On the teacher side of things, when you open the assignment in Google Classroom, click on a student's name and you'll be able to access a thumbnail that will open the student's video.


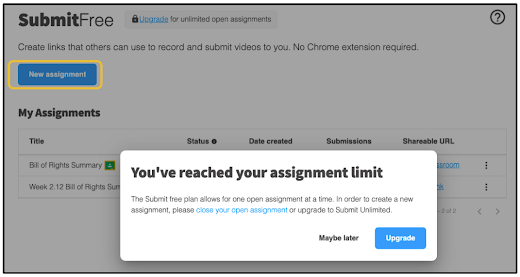
If you have a premium Screencastify subscription, you don't necessarily have the unlimited version of Submit. Submit is an add on to the premium subscription. Don't worry, this can be done for free. In the free version, you can only have one assignment open at a time. If this is you, the next time you click New assignment, a pop up will appear saying you've reached your assignment limit. No worries. You can still get away with using the free version.


To add a new assignment, click the three dots on the far right of your previous assignment. In the dropdown that appears, click Close assignment. With that assignment closed, you can now click New assignment and start a new one. 

If at all possible, I recommend adding the paid version of Submit to your account. But if that's not possible, you can accomplish much with the free version.

Thursday, April 8, 2021

Digital Organization Tips for Students with Gmail, Tasks and Calendar


Time management is something students need to learn to be successful the modern classroom and workforce. As more teachers rely on digital tools for distributing and collecting materials and student work, there are many simple ways in Google Workspace for students to manage time and organize themselves digitally. Take a look at a few of my favorite tips and tricks.

Google Classroom, Google Calendar and Google Tasks

When teachers assign assignments in Google Classroom, students receive an email notification. Keeping track of Google Classroom notifications for multiple classes can be tricky. To help to remember to work on an assignment, when the student opens the email, they can click the Add to Tasks button on the top toolbar. 


When they click the Add to Tasks button, Google Tasks will open on the right side panel. The subject of the email will be added as a task. Below the task, students will see a button that will give them one click access directly back to this email if they choose to address the assignment later. Next to the task, there is also an edit button.


When they click the edit button, they can add a time reminder that will alert them when they are ready to work on this assignment. 


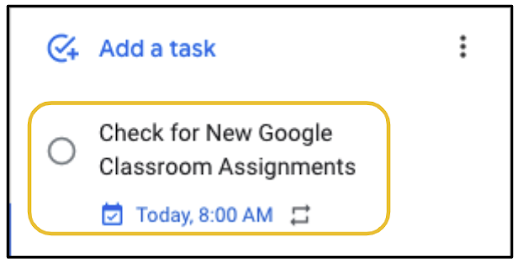
Another simple tip for students is to create a task independently that will remind them to check Google Classroom for new assignments and announcements. When they click edit, they can not only set a time reminder, but make it recur daily.


When students use Google Tasks, their tasks can appear in Google Calendar. If they have the Google Calendar app, they can receive push notifications on their phones for each task just like a calendar event. To enable Tasks in Google Calendar, on the left side, below My Calendars, click the checkbox for Tasks. In addition, students can view Google Classroom assignments in Google Calendar. They can enable this the same way as Tasks.


My recommendation for easily viewing tasks and Google Classroom assignments in Google Calendar, as seen above, is to use the Schedule view. You can change the view by clicking the button at the top next to the waffle. Enabling this view shows a list, in chronological order of all calendar events and tasks for one day at a time.


Organize Gmail Inbox with Labels

As an edtech coach, I have seen countless students' Gmail inboxes. More often than not, their inboxes are an unorganized mess with thousands of emails. A good practice for students is to organize their inboxes with labels. Think of labels in Gmail like folders in Google Drive. Have students create labels for each subject or teacher and move messages that need to be saved into the respective folders. Remind students to delete messages they know they don't need anymore.

For example, if there are a bunch of messages from science class, have students move them into a science label. Get started by check marking the messages you want to move. At the top, click the Move To button. 

If you don't have a label created yet, click Create new. If one is already created, click the label in the list that appears in the dropdown menu.

When you create a new label, a pop up will appear. Name the label and click Create.


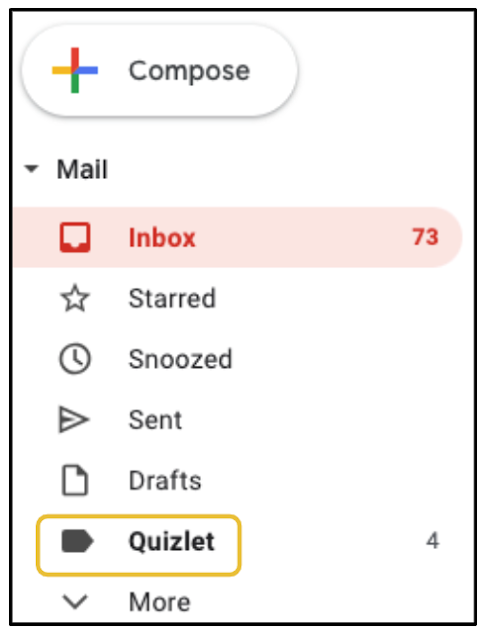
Your labels will appear in alphabetical order on the left side of Gmail below Drafts. Click on your labels to view the messages in each label.


Feel free to use these tips to streamline your workflow and organize your digital workload, and don't forget to share with your students.