How To Use the Print Friendly & PDF Chrome Extension
There are some great articles online that can be down right littered with ads. The amount of ads can often be a deal breaker when deciding whether or not to use the article for assignments with students. Next time you find a great article littered with ads, use the Print Friendly & PDF Chrome Extension to generate an ad-free PDF file of the article that is much more palatable for students.
The steps below show you how to get started installing the extension and how to use it.
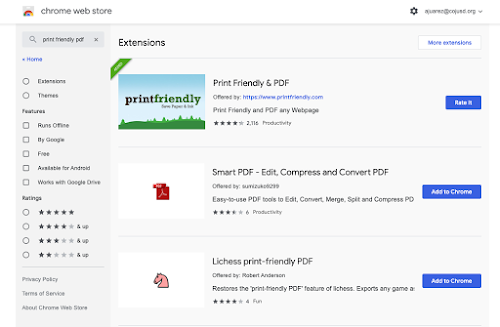
Step 1: Go to the Chrome Web Store and search for Print Friendly PDF.
Step 2: Click Add to Chrome. (This screenshot shows Remove from Chrome since I have already added it. The Add to Chrome button is in the same spot if you haven't added it yet. If your district's domain does not allow you to add Chrome extensions, contact whoever is in charge of the domain and ask them to push the extension to teacher browsers or allow this one to be installed.)
Step 3: When the extension has been installed, it will appear in your Chrome browser. When you find the article you want, click the extension button.
Step 4: After you click the extension button, a window will pop up and process the article like you see below. You will see most, if not all, ads removed.
Step 5: As you scroll down, hover your mouse over areas you'd like to eliminate from the article and click the trash can. This is useful if there are ads that didn't get taken out or if there is text you believe is extra or irrelevant.
Step 6: When you are ready, click the PDF button at the top right of the window. Then click Download Your PDF to download the file to your computer.
When you download it to your computer, you should then upload it into Google Drive. From there, it can be assigned or attached in Google Classroom. The video below shows you each step in real time.


No comments:
Post a Comment